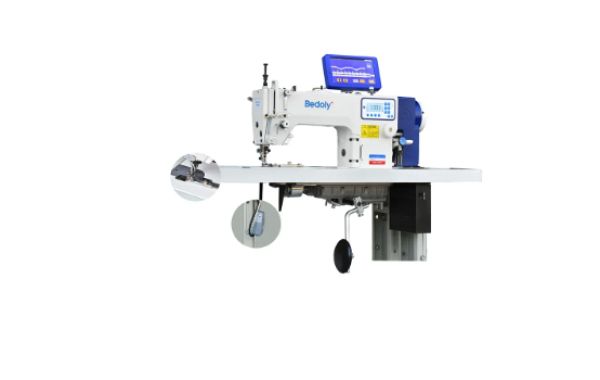
Introduction to the Special Sewing Machine
Welcome to our user guide for the special sewing machine designed specifically for curve bottom hemming! If you've ever struggled with achieving a flawless curved hem on your garments, fret no more. This innovative and user-friendly machine is here to revolutionize your sewing experience.
Whether you're an experienced seamstress or just starting out, this special sewing machine will become your new best friend. With its unique features and intuitive design, it's never been easier to achieve professional-looking results in no time.
In this comprehensive guide, we'll walk you through how to use the special sewing machine effectively, share some insider tips and tricks for getting the most out of it, and even delve into the art of hemming those tricky curve bottoms flawlessly.
So grab a cup of tea (or coffee!) and let's dive right in! Your journey towards perfect curves starts here.

How to Use the Special Sewing Machine
Using a special sewing machine can seem daunting at first, but with a little practice and guidance, you'll be able to master it in no time. Here's a step-by-step guide on how to use the special sewing machine for curve bottom hemming.
1. Familiarize yourself with the machine: Before diving into your project, take some time to understand the different components of the special sewing machine. Read through the user manual provided and get acquainted with all the buttons, knobs, and settings.
2. Prepare your fabric: Ensure that your fabric is clean and ironed before starting. Measure and mark where you want to create the curved bottom hem using tailor’s chalk or washable markers.
3. Set up the machine: Depending on your specific model, adjust the stitch length and width according to your desired outcome. Make sure you have chosen an appropriate needle size for your fabric type as well.
4. Practice on scrap fabric: If you're new to using this type of sewing machine or if it's been a while since you last used one, it's always beneficial to practice on scrap fabric first. This will help you get comfortable with adjusting tension settings and controlling the speed of stitching.
5. Begin stitching: Start by aligning your marked line along the presser foot guide or edge of any included attachments designed specifically for creating curved hems smoothly.
6.Carefully guide your fabric underthe needle while maintaining an even pace - too fast could result in uneven stitches; too slow may cause puckering or bunching.
7.Continue stitching until reaching ¼ inch from completion (or as per personal preference). Slow down when approaching corners or curves – this will ensure precision without compromising stitch quality.
Remember that practice makes perfect! Don't be discouraged if it takes a few attempts before achieving professional-looking results.
Tips and Tricks for Using the Special Sewing Machine
Using a special sewing machine can be an exciting and efficient way to create professional-looking garments. Here are some tips and tricks to help you get the most out of your special sewing machine.
It's important to familiarize yourself with the different settings and features of the machine. Take some time to read through the user manual and experiment with different stitches and tensions. This will allow you to understand how each setting affects the outcome of your sewing projects.
Another tip is to always start by preparing your fabric properly before sewing. Make sure it is evenly pressed, free from any wrinkles or creases that could affect the accuracy of your stitching. Using pins or clips can also help keep fabric in place while you sew.
When using a special sewing machine for curve bottom hemming, it's crucial to take extra care in handling curves. One trick is to slightly stretch the fabric as you sew around curves, which helps prevent puckering or pulling on the seams. Additionally, using a smaller stitch length can also provide more control when navigating tight curves.
Furthermore, don't forget about proper maintenance for your special sewing machine! Regularly clean out lint build-up from inside the machine and oil all necessary parts as instructed in the user manual. This will ensure smooth operation and extend its lifespan.
Practice makes perfect! Don't be discouraged if your first few attempts at using a special sewing machine aren't flawless – patience and perseverance are key here. With time and practice, you'll become more comfortable with operating this specialized tool.
Remember these tips and tricks when using your special sewing machine for curve bottom hemming, and soon enough you'll be creating beautiful garments with ease!

How to Hem a Curve Bottom
Hemming a curve bottom may seem like a daunting task, but with the right technique and a special sewing machine designed specifically for this purpose, it can be accomplished beautifully. Here are some tips to help you hem those tricky curved edges flawlessly.
1. Prepare the fabric: Start by marking the desired hemline on your fabric using tailor's chalk or pins. Make sure to account for any seam allowances.
2. Adjust the machine settings: Set your special sewing machine to the appropriate stitch length and width for hemming curves. It's important to choose a stitch that allows flexibility while maintaining durability.
3. Start sewing: Begin stitching along the marked hemline, guiding the fabric gently through the machine as you go. Take it slow and steady, allowing the machine to do its job smoothly.
4. Ease in any excess fabric: As you sew around curves, you may encounter areas where there is excess fabric due to their shape. To prevent puckering or bunching, gently ease in these sections while sewing.
5. Clip and press: Once you've completed stitching all around the curve bottom, carefully clip small notches into any curved seams to allow them to lie flat when pressed. Press your finished hem using an iron set at an appropriate temperature for your fabric type.
Remember, practice makes perfect! Don't be discouraged if your first attempt doesn't turn out exactly how you want it - keep refining your technique until you achieve professional-looking results every time.

Conclusion
Mastering the art of hemming curved bottoms can be a challenging task, but with the help of a special sewing machine designed specifically for this purpose, it becomes much easier. By following the user guide and implementing the tips and tricks mentioned in this article, you'll soon be able to achieve professional-looking results.
Remember to familiarize yourself with your specific machine's features and functions before starting any project. Take your time to adjust settings such as stitch length and tension according to the fabric you're working with.
When using the special sewing machine for curve bottom hemming, always start by pinning or basting your fabric in place to prevent any shifting during stitching. Take care not to stretch or distort the fabric while guiding it through the machine.
Don't forget about pressing! Pressing is an essential step in achieving crisp and neat hems. Use an iron on low heat setting or use a press cloth if necessary, ensuring that you press along curves gently so as not to flatten them.
Practice makes perfect! Don't get discouraged if your first attempts don't turn out exactly as expected. With patience and persistence, you will improve your skills over time.
Now that you have all the knowledge needed to use a special sewing machine for curve bottom hemming effectively, go ahead and unleash your creativity! Explore different fabrics, experiment with various stitches, and create beautiful garments with perfectly finished curved hems.
Ningbo Sanhexin Automation Co., Ltd. was established in 2012 with a team focusing on sewing machine RD, production, manufacturing and sales experience. If you have any questions about sewing machines or need an order, please contact us.995169123@qq.com